
This article continues this overview of chaos engineering solutions for Kubernetes. It shares our recent experience testing the robustness and resilience of applications in a Kubernetes cluster using the Chaos Mesh operator.
In the process of preparing our application to run in production, we had to test several disruptive scenarios in its staging environment:
- failing nodes where our microservices were running;
- failing infrastructure dependencies (e.g., database StatefulSets, queue managers, etc.);
- network problems.
As you probably remember from our previous article, Chaos Mesh as a solution consists of two components with self-descriptive names: Chaos Operator and Chaos Dashboard. We’ll start by reviewing the basics of its operator.
New features
Since we tried Chaos Mesh in the mentioned overview, some additional destruction functions have been added. Here are some new experiments you can run in the Kubernetes cluster:
- JVM Application Faults: Basically, this is a new byteman module for detailed testing applications running on the Java virtual machine. Its scripts allow you to generate exceptions, explicitly and redundantly call the garbage collector, swap values returned by methods, and do other horrible things. The module requires Linux kernel v4.1 or newer.
- Simulate AWS/GCP Faults: This is straightforward: Chaos Mesh accesses AWS or GCP and can stop/restart specific EC2 and GCP instances or mercilessly toy with their disks!
- HTTP faults: This set of experiments allows you to simulate different HTTP server errors: drop connections, introduce delays, replace or append contents of HTTP requests or responses, and spoof response codes. You can specify an exact path to modify requests for or go all-in and use the wildcard (
*) character that influences everything.
Finally, Chaos Mesh lets you test the physical or virtual machines in addition to the Kubernetes cluster’s resources. However, this requires installing a Chaosd server in addition to the operator itself. You can then run the same experiments and control them through an operator in your Kubernetes cluster.
Installation
You can simply install Chaos Mesh via the Bash script suggested in the documentation, but we strongly recommend using a Helm chart.
First, create a namespace:
kubectl create namespace chaos-testingThen, install the operator. Be sure to configure the correct container runtime; otherwise, the operator will fail to carry out the experiments.
The command below installs Chaos Mesh with containerd as the container runtime:
helm install chaos-mesh chaos-mesh/chaos-mesh -n=chaos-testing --set chaosDaemon.runtime=containerd --set chaosDaemon.socketPath=/run/containerd/containerd.sockYou will get the following set of resources in the chaos-testing namespace:
$ kubectl -n chaos-testing get pods
NAME                                              READY   STATUS    RESTARTS   AGE
chaos-controller-manager-5f657fc99c-2k8v8         1/1     Running   0          7d7h
chaos-controller-manager-5f657fc99c-xr9sq         1/1     Running   0          7d7h
chaos-controller-manager-5f657fc99c-zjg7c         1/1     Running   0          7d7h
chaos-daemon-56n5r                                1/1     Running   0          7d7h
chaos-daemon-9467d                                1/1     Running   0          7d7h
chaos-daemon-hjcgb                                1/1     Running   0          7d7h
chaos-daemon-hxnjt                                1/1     Running   0          7d7h
chaos-dashboard-7c95b6b99b-7ckr7                  1/1     Running   0          7d7h
Note the large number of chaos-daemon Pods. The operator requires running a daemon on all nodes associated with the namespace to be tested. For example, that may include a group of StatefulSet nodes with their own taints, etc. Keep this in mind and configure the DaemonSet operator appropriately.
All roads don’t lead to the Chaos Dashboard?
Ok, here comes Chaos Dashboard. You can access it by forwarding the port of the corresponding service:
kubectl port-forward -n chaos-testing svc/chaos-dashboard 2333:2333Another option is to configure Ingress if, for some reason, you need to access the dashboard from an outside network. But, for obvious reasons, that’s ill-advised.
You should at least use the Basic Ingress Authentication mechanism to protect the Chaos Dashboard from outside access.
The Dashboard welcome screen looks as follows:
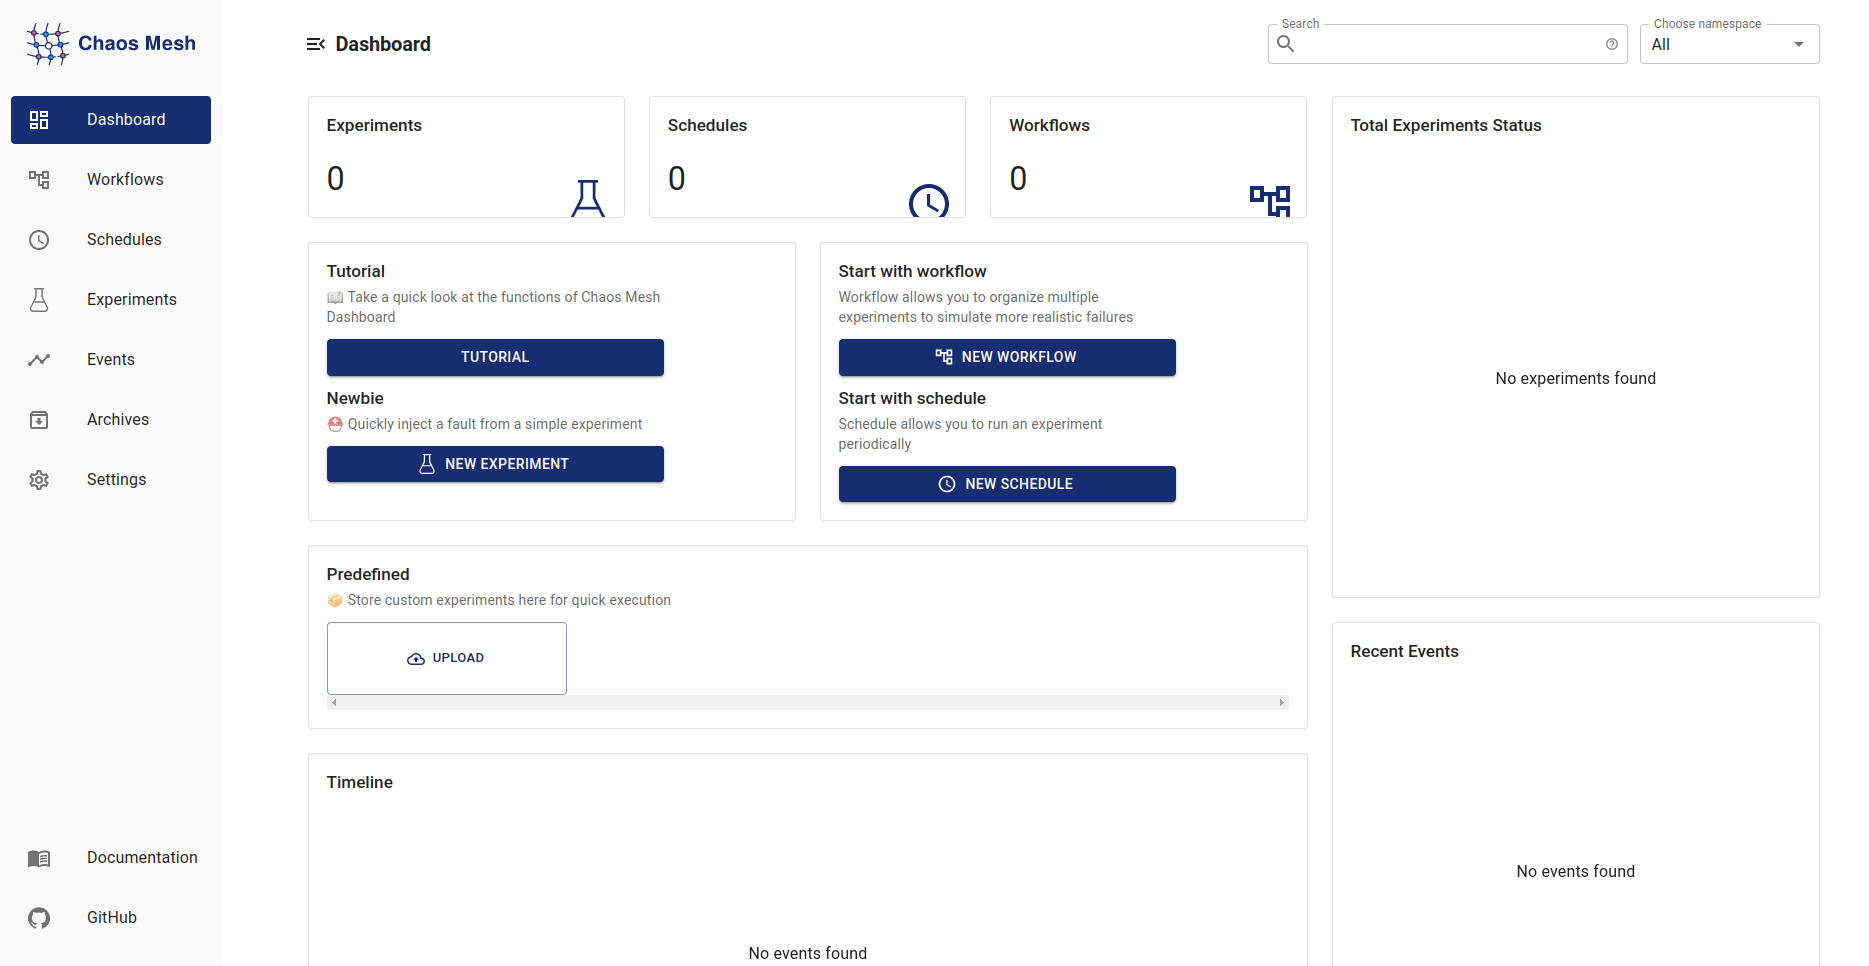
It includes a quick and easy-to-follow tutorial, and for that reason, we won’t be going through all the elements of Chaos Dashboard in detail.
The most significant advantage of Chaos Dashboard is the ability to draw up an experiment manually and generate a YAML manifest to run later. Still, we recommend that you check the manifest beforehand. Chaos Dashboard is not perfect and isn’t foolproof: some scenarios have errors. For example, when defining a NetworkChaos experiment, you can select “direction both” and omit the “target”. The dashboard will humbly generate a manifest, but the latter will not work.
You can monitor the running experiments in the Experiments tab and quickly undo them if something goes wrong (provided, of course, that the chaos daemon is present on every node involved).
In the Workflow tab, you can define composite scenarios, assembling them out of any Chaos Mesh experiments like a constructor. Workflow can be individual (essentially a routine experiment), serial, or parallel.
It is also possible to create a Task workflow. It lets you run an additional container based on the specified image to execute the necessary command. There is also an HTTP Request workflow.
In the Schedules tab, you can define the experiments to be repeated according to a cron schedule.
For beginners, manually describing complex workflow-based experiments can be tricky and error-prone, so Chaos Dashboard is an excellent way to get acquainted with the operator.
But that, unfortunately, is where its advantages end. I didn’t like the lack of a delayed start option. After setting up the entire workflow, your only choice is to click the Submit button, launching your experiments immediately. Of course, you can put the generated experiments into a separate repository and run them as part of the CI/CD process. Still, providing a lightweight repository for manifests would be a good idea. Moreover, why not put them in the controller’s Pods in the first place? After all, storing experiments together with the tool that generates, runs, and monitors them makes much more sense.
The beginner chaos wizard’s spellbook
Our first task is to see how the cluster responds to worker failures.
The tested dev cluster had four nodes with no affinities or tolerations; thus, the StatefulSet Pods ran on the nodes to which the scheduler allocated them without any regard for additional restrictions. We decided to reboot one node at a time and see what would happen. Isn’t that fun?
To do so, we used the AWS Fault scenario.
First, create a secret containing AWS keys:
apiVersion: v1
kind: Secret
metadata:
  name: сrucible
  namespace: chaos-testing
type: Opaque
stringData:
  aws_access_key_id: ZG9vbWd1eQo=
  aws_secret_access_key: bmV2ZXIgc2FpZCBoZWxsbwo=
Create a new serial workflow in the dashboard. Specify the number of sub-experiments in the Number field:
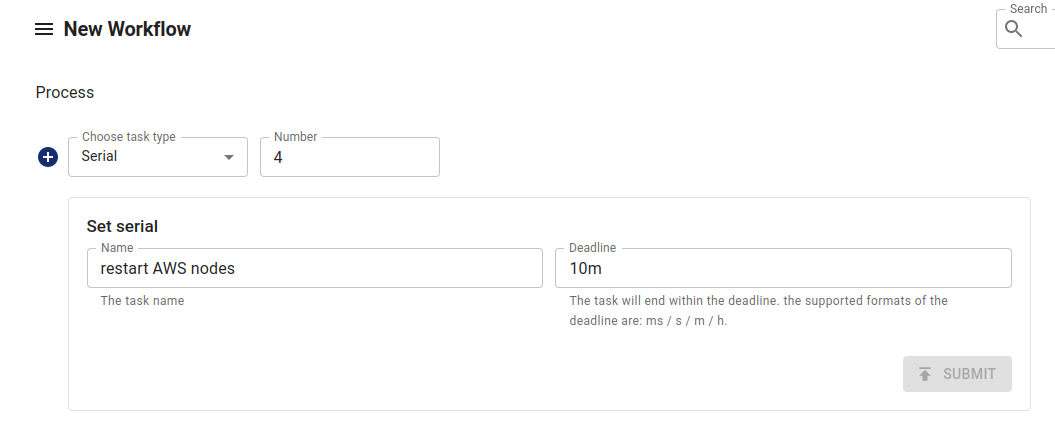
Note that you can choose the type of sub-experiment. In other words, you can create a series of tasks with serial or parallel experiments. In our case, we will use the Single type and create a subtask to restart each worker node in the cluster. Select Kubernetes → AWS Fault → Restart EC2. Fill in the final form with the name of the pre-created Secret with the keys, the region where the machines are located, and the Instance ID.
Once all the subprocesses are defined, click Submit for the Serial task. Don’t worry; this won’t cause the experiments to run right away but will generate a YAML file describing them. This is the one we got:
kind: Workflow
apiVersion: chaos-mesh.org/v1alpha1
metadata:
  namespace: staging
  name: serial-ec2-restarts
spec:
  entry: entry
  templates:
    - name: entry
      templateType: Serial
      deadline: 20m
      children:
        - serial-ec2-restarts
    - name: restart-i-<1st_node_id>
      templateType: AWSChaos
      deadline: 5m
      awsChaos:
        action: ec2-restart
        secretName: crucible
        awsRegion: eu-central-1
        ec2Instance: i-<1st_node_id>
    - name: restart-i-<2nd_node_id>
      templateType: AWSChaos
      deadline: 5m
      awsChaos:
        action: ec2-restart
        secretName: crucible
        awsRegion: eu-central-1
        ec2Instance: i-<2nd_node_id>
    - name: restart-i-<3d_node_id>
      templateType: AWSChaos
      deadline: 5m
      awsChaos:
        action: ec2-restart
        secretName: crucible
        awsRegion: eu-central-1
        ec2Instance: i-<3d_node_id>
    - name: restart-i-<4th_node_id>
      templateType: AWSChaos
      deadline: 5m
      awsChaos:
        action: ec2-restart
        secretName: crucible
        awsRegion: eu-central-1
        ec2Instance: i-<4th_node_id>
    - name: serial-ec2-restarts
      templateType: Serial
      deadline: 20m
      children:
        - restart-i-<1st_node_id>
        - restart-i-<2nd_node_id>
        - restart-i-<3d_node_id>
        - restart-i-<4th_node_id>
The deadline field here is solely for tracking sub-experiments. If the subtests fail to complete by the time set in the deadline field of the workflow template, all the experiments in that workflow will be terminated.
It also seems that you can’t insert timeouts between workflow experiments (which seems necessary, right?). The deadline won’t help you in this case because that isn’t what it’s related to. Some tasks do have timeouts; for instance, you can adjust the gracePeriod before killing the container in the PodChaos experiments, but that’s it.
Let’s look at the resulting workflow that simulates the RabbitMQ and PostgreSQL failures as well as network issues.
Let’s start by giving our rabbit a hard time:
apiVersion: chaos-mesh.org/v1alpha1
kind: Workflow
metadata:
  name: rmq-kill-{{- uuidv4 }}
  namespace: staging
spec:
  entry: entry
  templates:
    - name: entry
      templateType: Serial
      deadline: 30m
      children:
        - rabbit-disaster-flow
    - name: crashloop-rabbit
      templateType: PodChaos
      deadline: 4m
      podChaos:
        selector:
          namespaces:
            - staging
          labelSelectors:
            statefulset.kubernetes.io/pod-name: rabbitmq-server-0
        mode: all
        action: pod-failure
    - name: rabbit-kill
      templateType: PodChaos
      deadline: 20m
      podChaos:
        selector:
          namespaces:
            - staging
          labelSelectors:
            statefulset.kubernetes.io/pod-name: rabbitmq-server-0
        mode: all
        action: pod-kill
        gracePeriod: 5
    - name: parallel-stress-on-rabbit
      templateType: Parallel
      deadline: 6m
      children:
        - rabbitserver-stress
        - rabbitserver-packets-corruption
    - name: rabbitserver-stress
      templateType: StressChaos
      deadline: 6m
      stressChaos:
        selector:
          namespaces:
            - staging
          labelSelectors:
            statefulset.kubernetes.io/pod-name: rabbitmq-server-0
        mode: all
        stressors:
          cpu:
            workers: 2
            load: 65
          memory:
            workers: 2
            size: 512MB
    - name: rabbitserver-packets-corruption
      templateType: NetworkChaos
      deadline: 6m
      networkChaos:
        selector:
          namespaces:
            - staging
          labelSelectors:
            statefulset.kubernetes.io/pod-name: rabbitmq-server-0
        mode: all
        action: corrupt
        corrupt:
          corrupt: '50'
          correlation: '50'
    - name: rabbit-disaster-flow
      templateType: Serial
      deadline: 30m
      children:
        - crashloop-rabbit
        - rabbit-kill
        - parallel-stress-on-rabbit
The uuidv4 Helm function generates unique names here because if the name is hardcoded, you cannot rerun the workflow without first deleting it.
This serial workflow first emulates the crash loop for all the Pods with the rabbitmq-server-0 label, then kills them, and finally runs the StressChaos and NetworkChaos experiments in parallel. Yes, it looks pretty daunting, but the goal is, after all, to see how the cluster will behave under challenging conditions of global failure, isn’t it?
We also decided to take down our rabbit again but in a different way this time… by politely inviting the OOM Killer:
apiVersion: chaos-mesh.org/v1alpha1
kind: Workflow
metadata:
  name: rmq-stresss-{{- uuidv4 }}
  namespace: staging
spec:
  entry: entry
  templates:
    - name: entry
      templateType: Serial
      deadline: 10m
      children:
        - rabbit-disaster-flow
    - name: burn-rabbit-burn
      templateType: StressChaos
      deadline: 5m
      stressChaos:
        selector:
          namespaces:
            - staging
          labelSelectors:
            statefulset.kubernetes.io/pod-name: rabbitmq-server-0
        mode: all
        stressors:
          cpu:
            workers: 5
            load: 100
          memory:
            workers: 5
            size: 3GB
    - name: parallel-stress-on-rabbit
      templateType: Parallel
      deadline: 5m
      children:
        - rabbitserver-stress
        - rabbitserver-packets-corruption
    - name: rabbitserver-stress
      templateType: StressChaos
      deadline: 5m
      stressChaos:
        selector:
          namespaces:
            - staging
          labelSelectors:
            statefulset.kubernetes.io/pod-name: rabbitmq-server-0
        mode: all
        stressors:
          cpu:
            workers: 3
            load: 70
          memory:
            workers: 2
            size: 777MB
    - name: rabbitserver-packets-corruption
      templateType: NetworkChaos
      deadline: 5m
      networkChaos:
        selector:
          namespaces:
            - staging
          labelSelectors:
            statefulset.kubernetes.io/pod-name: rabbitmq-server-0
        mode: all
        action: corrupt
        corrupt:
          corrupt: '50'
          correlation: '50'
    - name: rabbit-disaster-flow
      templateType: Serial
      deadline: 10m
      children:
        - burn-rabbit-burn
        - parallel-stress-on-rabbit
The scenario for PostgreSQL is similar to the one for RabbitMQ, so we will skip that in order to save space.
We were more interested in testing the network in a particular namespace.
Let’s use the following workflow:
apiVersion: chaos-mesh.org/v1alpha1
kind: Workflow
metadata:
  name: namespace-wide-network-disaster
  namespace: staging
spec:
  entry: entry
  templates:
    - name: entry
      templateType: Serial
      deadline: 13m
      children:
        - network-nightmare
    - name: delay-chaos
      templateType: NetworkChaos
      deadline: 10m
      networkChaos:
        selector:
          namespaces:
            - staging
        mode: all
        action: delay
        delay:
          latency: 60ms
          jitter: 350ms
          correlation: '50'
        direction: both
    - name: bad-packet-loss
      templateType: NetworkChaos
      deadline: 10m
      networkChaos:
        selector:
          namespaces:
            - staging
        mode: all
        action: loss
        loss:
          loss: '30'
          correlation: '50'
        direction: both
    - name: duplicate-packets
      templateType: NetworkChaos
      deadline: 10m
      networkChaos:
        selector:
          namespaces:
            - staging
        mode: all
        action: duplicate
        duplicate:
          duplicate: '15'
          correlation: '30'
        direction: both
    - name: corrupt-packets
      templateType: NetworkChaos
      deadline: 10m
      networkChaos:
        selector:
          namespaces:
            - staging
        mode: all
        action: corrupt
        corrupt:
          corrupt: '13'
          correlation: '25'
        direction: both
    - name: network-nightmare
      templateType: Parallel
      deadline: 10m
      children:
        - delay-chaos
        - bad-packet-loss
        - duplicate-packets
        - corrupt-packets
For ten minutes, severe network packet delays, losses, duplications, and corruption were simulated for Pods in the relevant namespace. The test again turned out to be rather violent, and all the Pods were terminated due to failed probes, so we decided to render its parameters more flexible. However, something is intriguing about it. Do you see the error? I don’t see it either, but it’s there.
You can only specify a namespace in the dashboard; the documentation does not offer any other parameters either. One-off experiments work just fine, but complex network abuses cause problems. How does it work? Well, the daemons edit the iptables rules in the containers. That’s all. Unfortunately, Chaos Mesh sometimes forgets to undo those changes unless a specific selector is specified.
The fix is simple: add a label to all the containers in the namespace before running the test:
kubectl -n staging label pods --all chaos=target --overwriteThere is another nuisance you may encounter. In some cases, a chaos daemon should be running on the node, but it is not there. As a result, the workflow will not terminate properly, and many Chaos Mesh resources will continue to run in the cluster. The dashboard will endlessly show them as being removed.
You can fix this by adding tolerations to the DaemonSet, so its Pods get scheduled to the proper nodes. Occasionally, some Pods can get stuck in a crash loop during testing. If the workflow includes the NetworkChaos scenario, the controller will wait for the Pod to start to ensure its iptables are correct. You can obviously fix this (as well as the iptables) by removing the problematic Pod manually (kubectl delete pod).
What if all the Pods are running, the daemons are in place, but the workflow and its subresources are stuck and refuse to be deleted? Well, then it is time to do some scripting:
#!/usr/bin/env bash

set +e
export res_list=$(kubectl api-resources | grep chaos-mesh | awk '{print $1}')

for i in $res_list;
do
kubectl -n staging get $i --no-headers=true | awk '{print $1}' | xargs
kubectl -n staging patch $i -p '{"metadata":{"finalizers":null}}' --type=merge
kubectl -n staging get $i --no-headers=true | awk '{print $1}' | xargs
kubectl -n staging delete $i --force=true
done

kubectl -n staging label pods --all chaos-
set -e
The script runs through all Chaos Mesh resource manifests, removes its finalizer, and mercilessly deletes the manifests.
Conclusion
While Chaos Mesh might have some specific flaws, it turned out to be a good chaos engineering solution for our needs.
We generated an additional load on the application in its staging environment using our JMeter-based client. Ultimately, we were happy to test everything we wanted and prove that infrastructure development for the production environment was on the right track.
Kudos to the Chaos Mesh authors, and good luck to everyone with your chaos experiments!

Comments